Quick start
This chapter is intended for the impatient who want to create a Viper.NET project with an initial, empty image processing flow as quickly as possible.
A more detailed guide with additional explanations is located here: Example project Step-by-Step
Create Viper.NET project
Start Viper.NET by double click
Click on “New project”, then select the “Vision project” template.
Enter folder (e.g.
C:\ViperProjects\FirstProject) and project name (e.g.FirstProject). At the bottom of the list also enterFirstProjectin each line.Start Viper.NET project
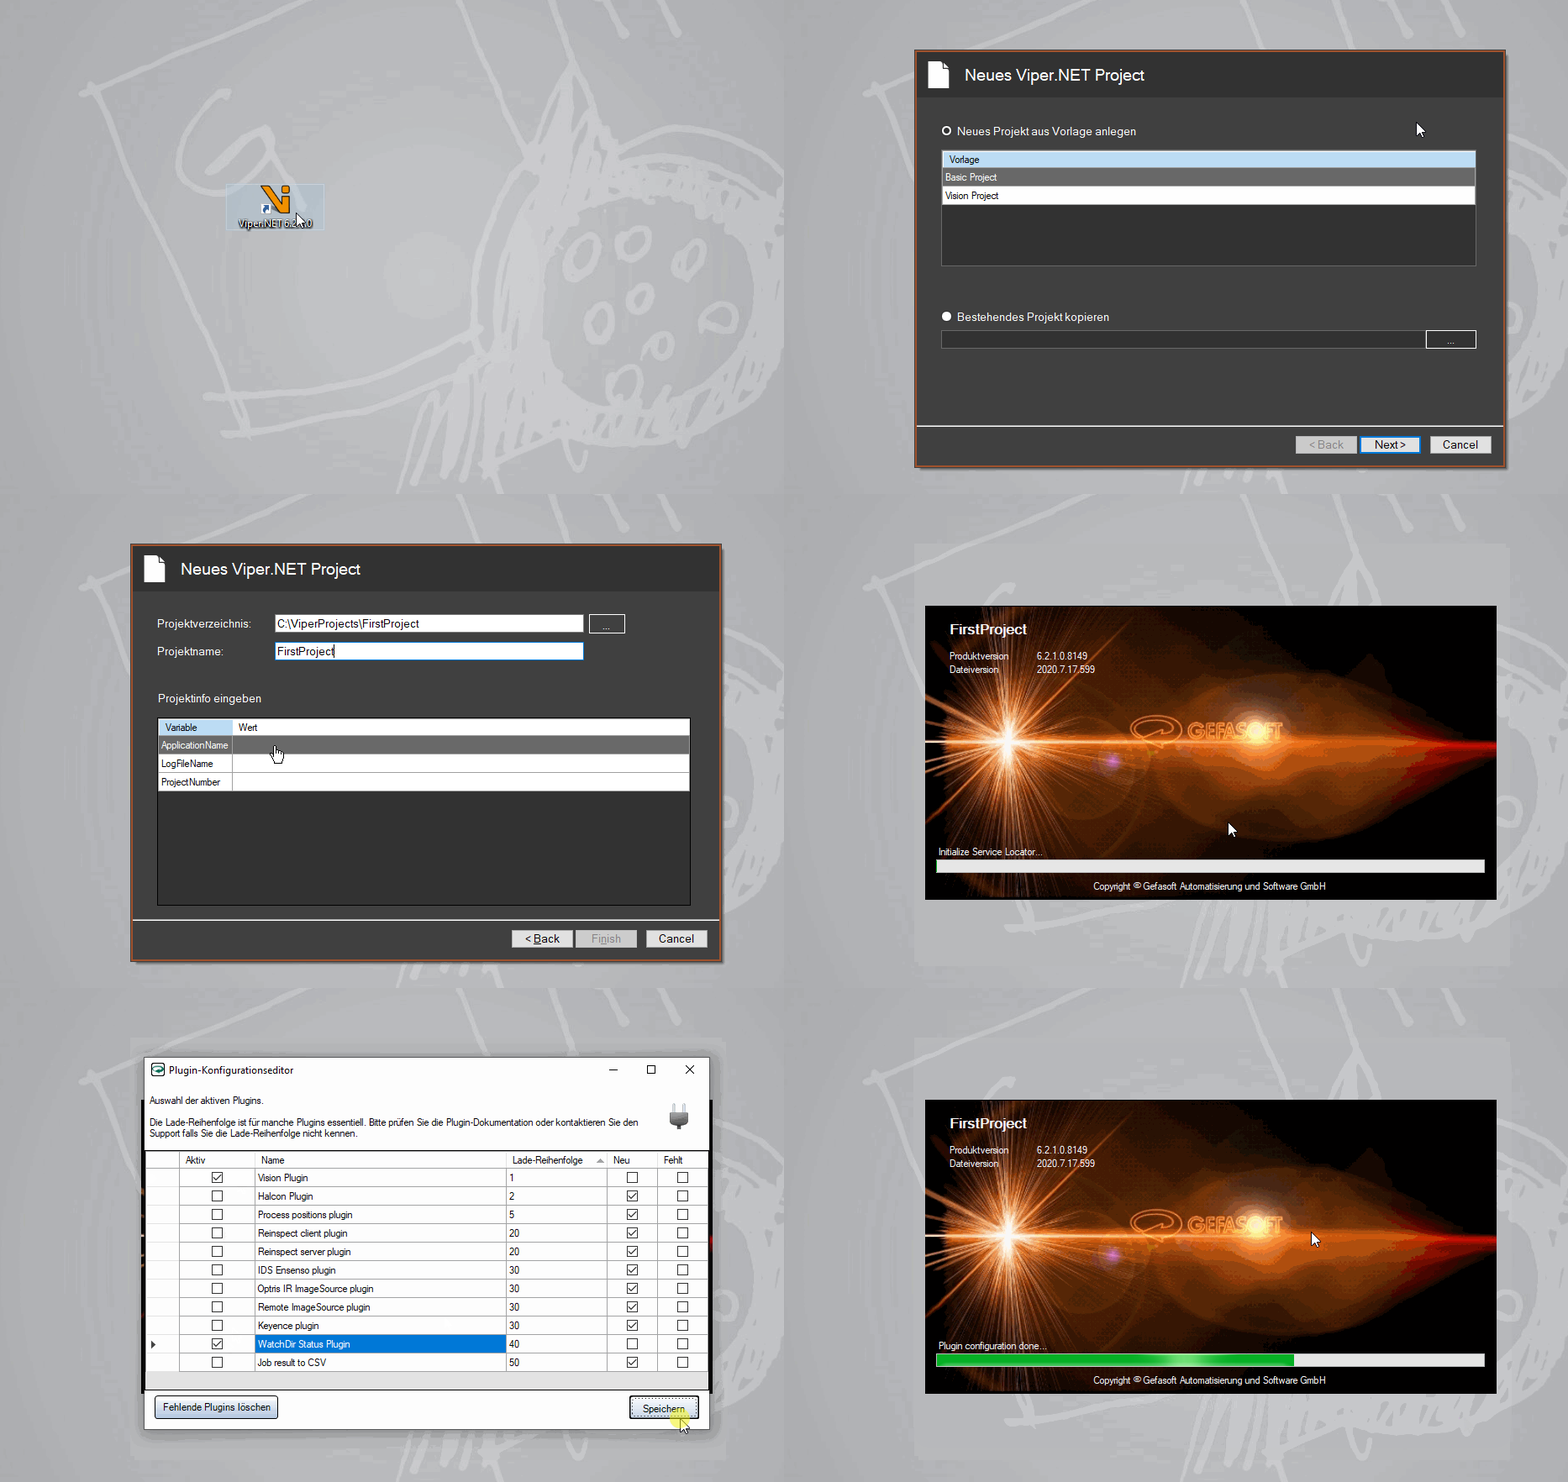
The first image processing job
Create BV type and job
At the bottom left click on the Gefasoft sign, then click on Functions->Type management.
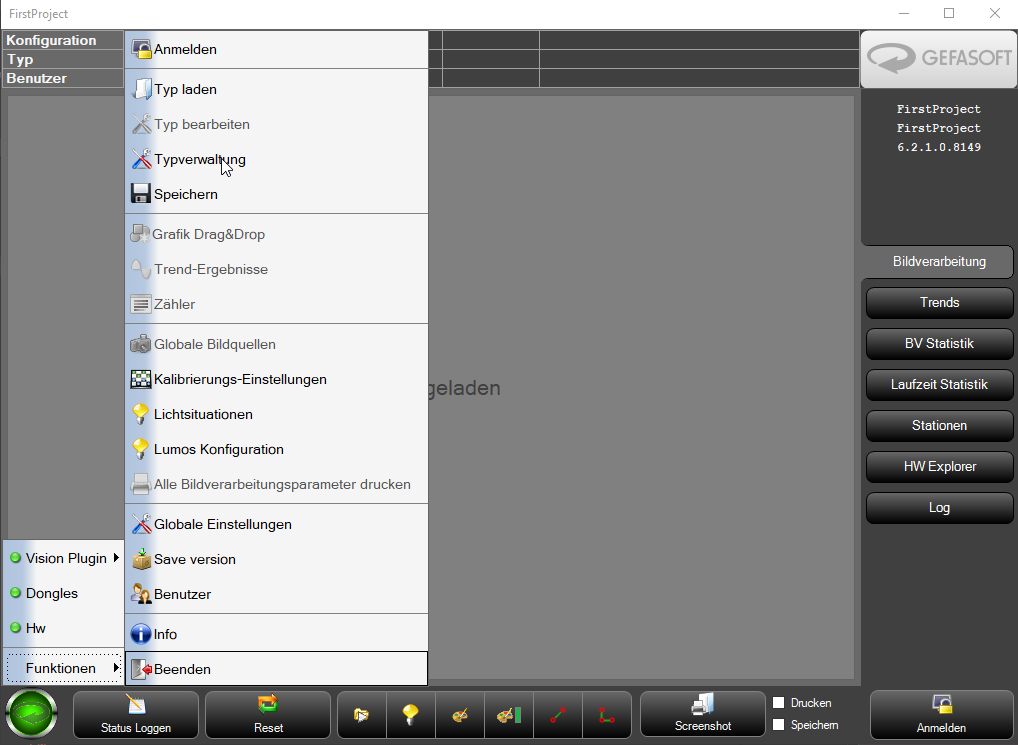
Click on “New” in the type administration, then enter “Test” in the Name field and click on “OK”.
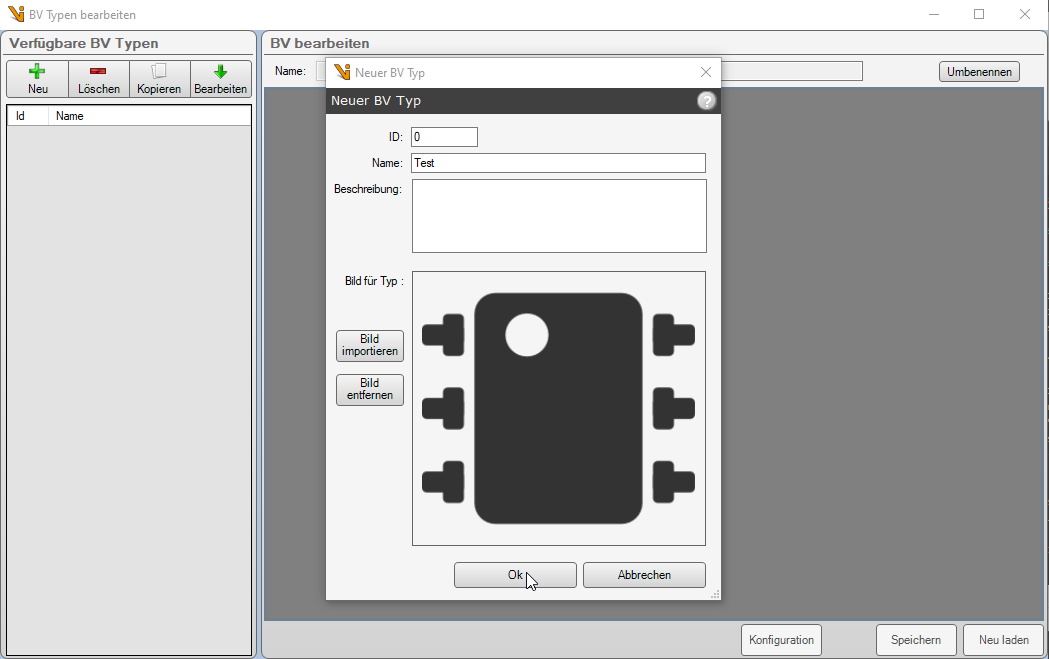
In the following dialog click on “Auto-create jobs” and then on “OK”.
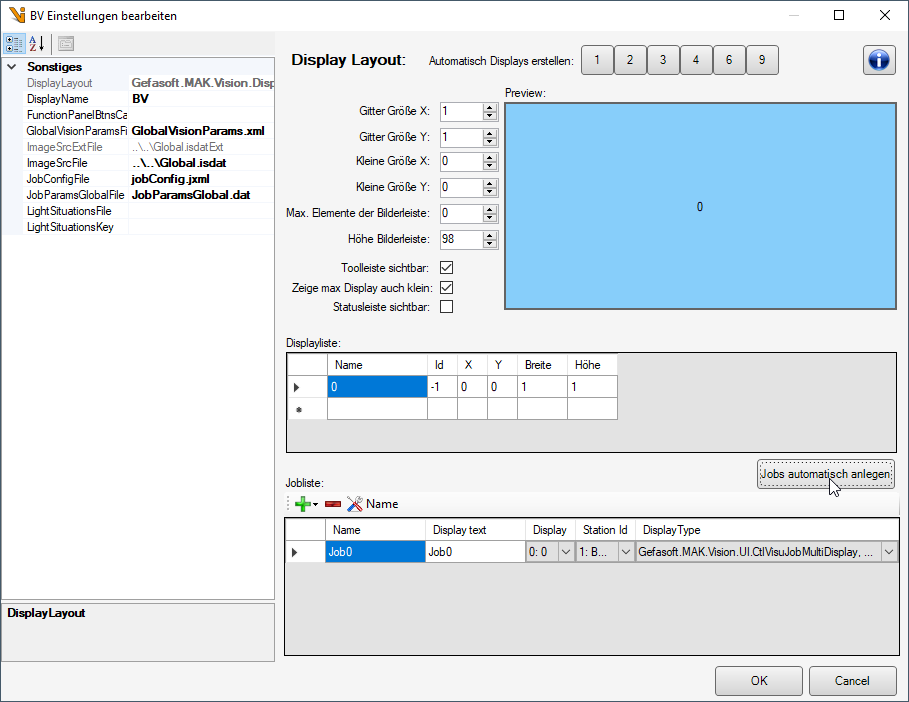
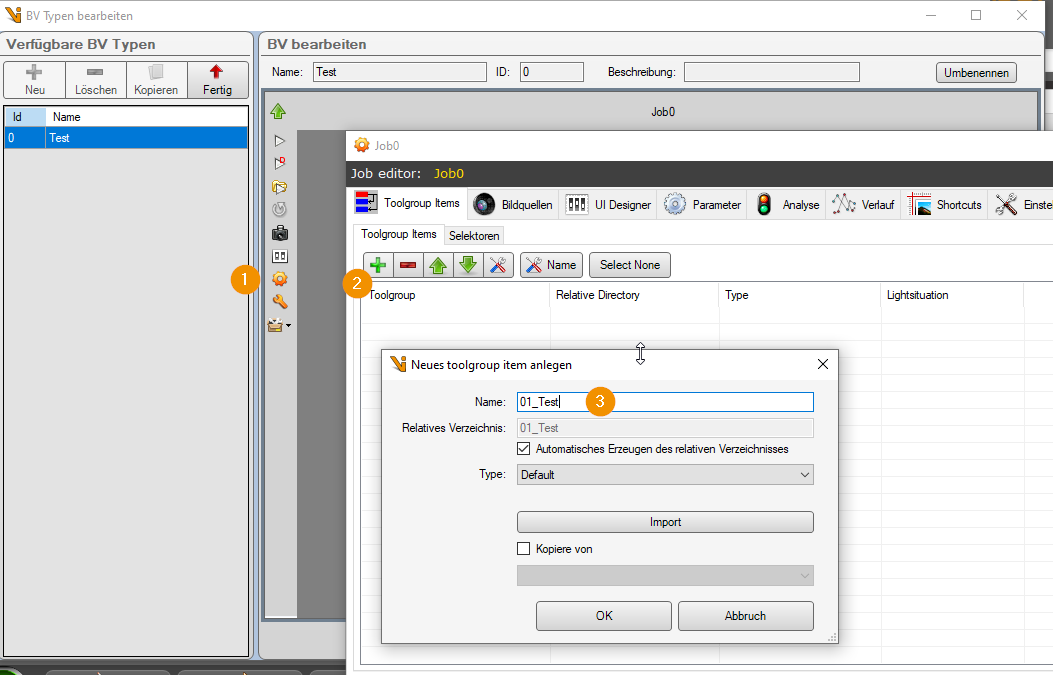
Open the Job Editor via the sidebar in the display and create a new ToolGroupItem.
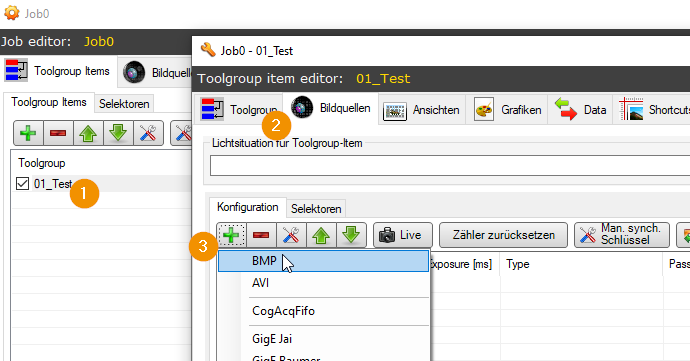
Double-click the new ToolGroupItem, then switch to Image sources in Image sources and create a BMP image source.
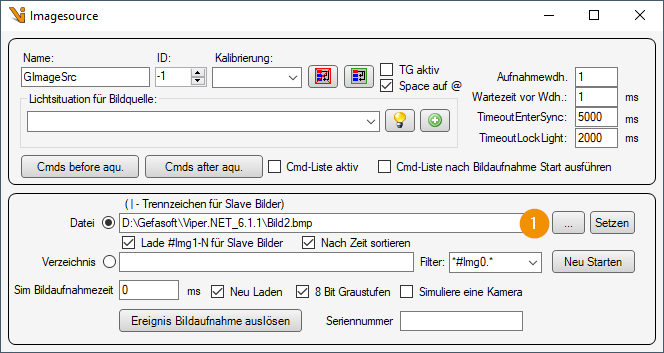
Double-click the image source and load any image file.
Close Image Source. Under the image sources in the area, assign the image source to an input terminal.
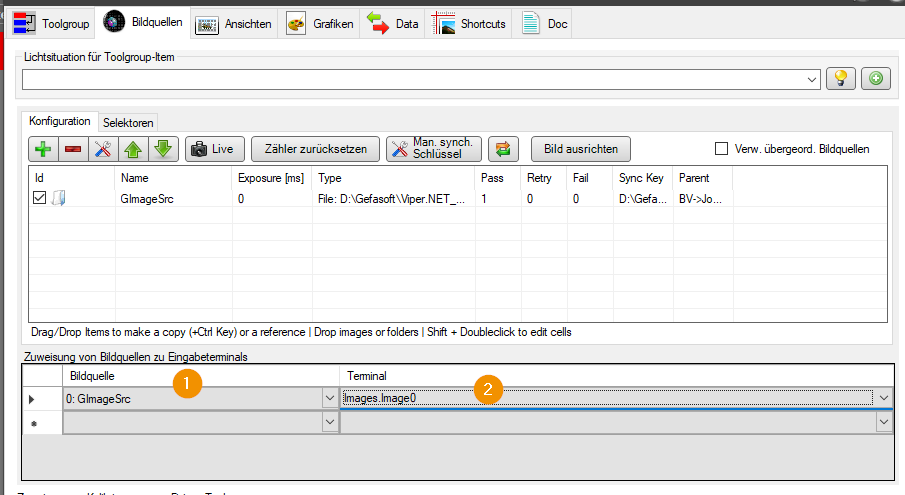
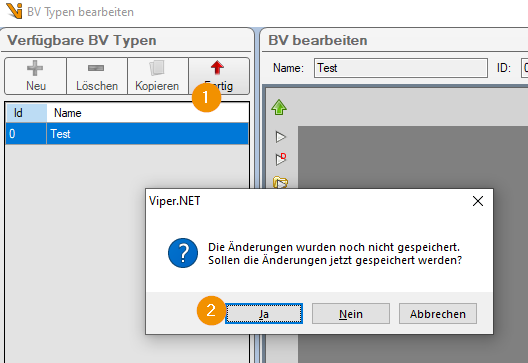
Close image source, Toolgroup Item Editor and Image sources, click “Done” in the type management, then click “Yes” at the “Save changes” query. Answer the query for archiving with “No”.
Type load and test
In Viper.NET click on the Gefasoft sign at the bottom left, then click on “Functions->Load Type” and load the type you just created.
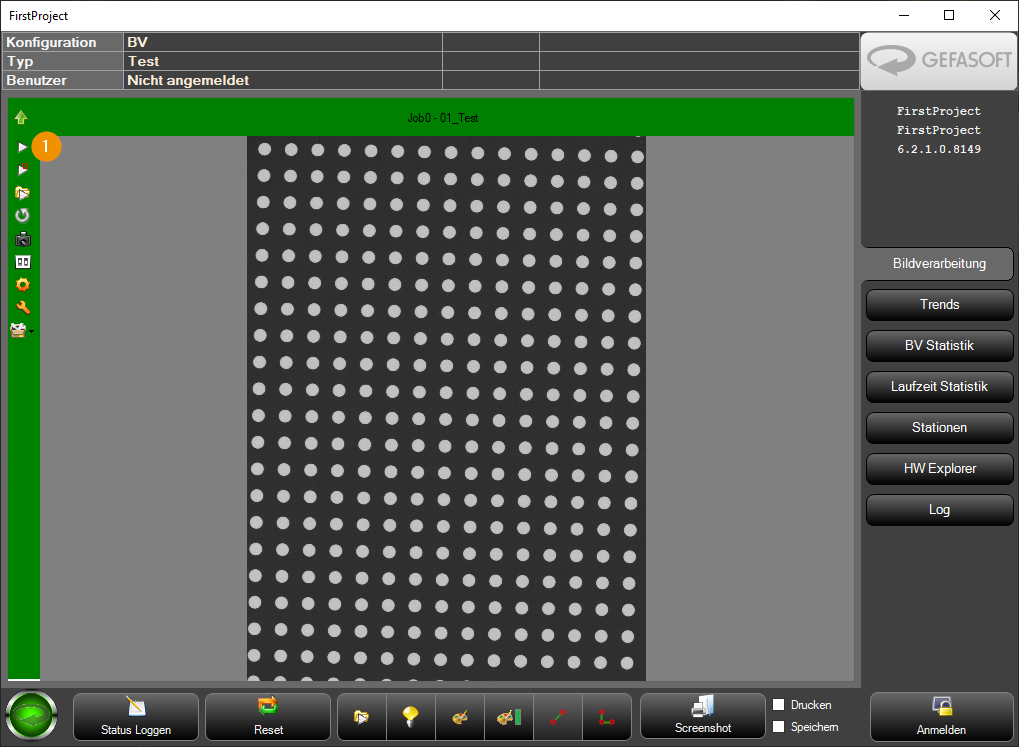
Click on the “Play” button at the top left of the display. Now the picture should be taken and shown in the display, also the display will be colored green.
