Create and start projects
When starting Viper.NET, either an existing project must be loaded or a new one must be created:
Here an existing project can be loaded or a new project can be created. The last used projects can be started from the list by double-clicking.
Viper.NET can also be opened directly with a project, either by double-clicking on the project file or via commandline.
Project templates
For new projects, Viper.NET uses project templates. Viper.NET contains one template each for projects with or without image processing. Alternatively, an existing project can be copied.
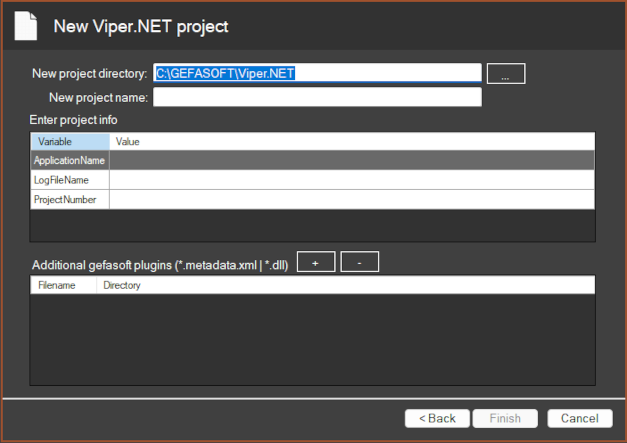
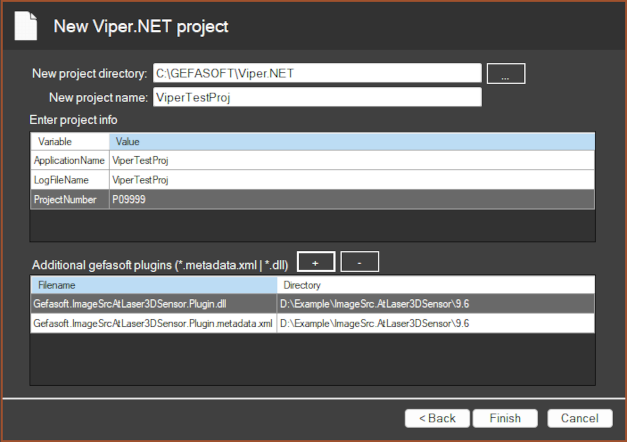
When creating a project, an (empty) project directory and a project name must be assigned. In addition, the templates contain variables that are replaced by the actual values when the project is created. Meaningful values must be specified for all variables:

Plugins that are not supplied with the installer can be added to the project in the lower area with “+”. These are then automatically copied to the corresponding project directory. All files belonging to the plugin must be added. If wrong files have been added by mistake, they can be removed again with “-”.

When copying projects, variable substitution is not available.
Several versions of Viper.NET
Several Viper.NET versions can be installed on one PC at the same time. However, each Viper.NET installation provides files that are needed centrally in the system (e.g. the VisionPro Tools in the Cognex VisionPro installation folder).
To prevent the different installations from affecting each other, these files are installed on demand when Viper.NET is started (auto-installation). Different Viper.NET versions can thus be installed at the same time but not started.
Auto-Installation
The auto-installation is done in three steps:
Check the last started version (file
%PROGRAMDATA%\Gefasoft\Viper.NET\CurrentVersion.xml).Deleting the files installed by the last version
Installation of the required files.
It is performed when one of the following conditions applies:
First launch of Viper.NET
The last Viper.NET version is different from the current version
Administrator privileges are required for auto-installation. Command line parameters allow to control the auto-installation.
The Windows Explorer context menu for a project file (right mouse click on the “.makproj” file) additionally contains in the entry “Viper.NET”:
Start with “-repair” |
Starts the project and forces auto-installation |
Upgrade project version |
Start project with a newer Viper.NET version |
Upgrade project to newer Viper.NET version
For a version upgrade, a project is simply opened with the newer Viper.NET version.
Optionally, the upgrade can also be started via the context menu of the project file:
During the upgrade, Viper.NET may modify files or adjust the project structure. Therefore, the project can no longer be opened with the previous version after the upgrade. Before upgrading, it is therefore essential to create a backup copy of the project.
Please note: Project specific plugins must be updated before the upgrade!