Type management
Checks for different product types are created in type management.
Create or edit types
Type management is accessed via the main-menu. New types are created, deleted, copied and edited here (1).
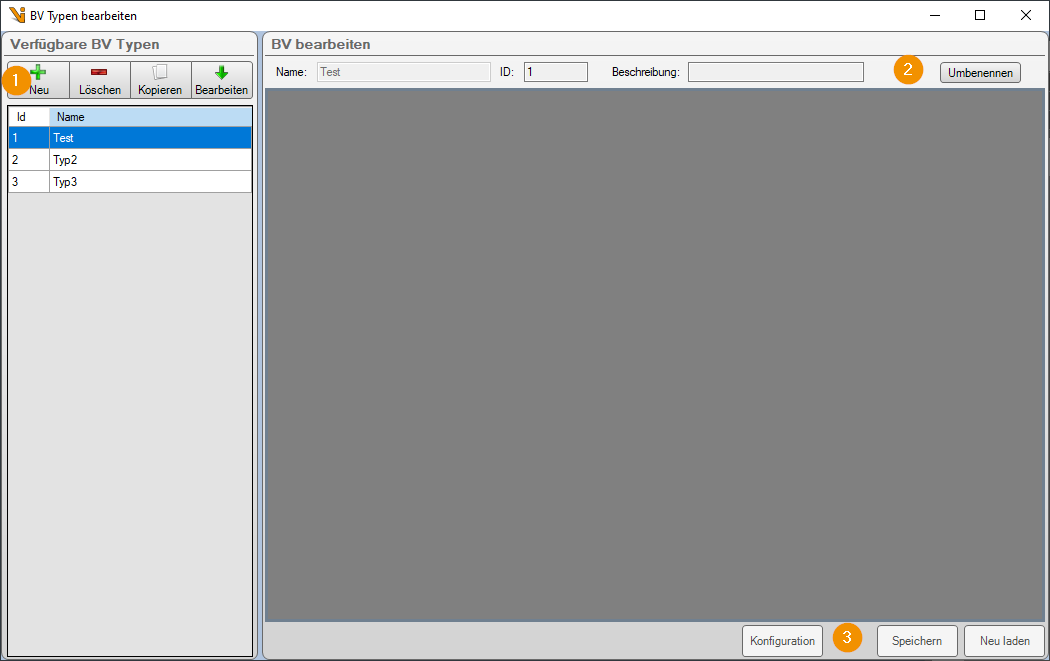
In edit mode, the buttons (3) are activated and the selected type is loaded into the editor on the right. All settings can be adjusted in the same way as if the type was loaded as active type in Viper.NET.
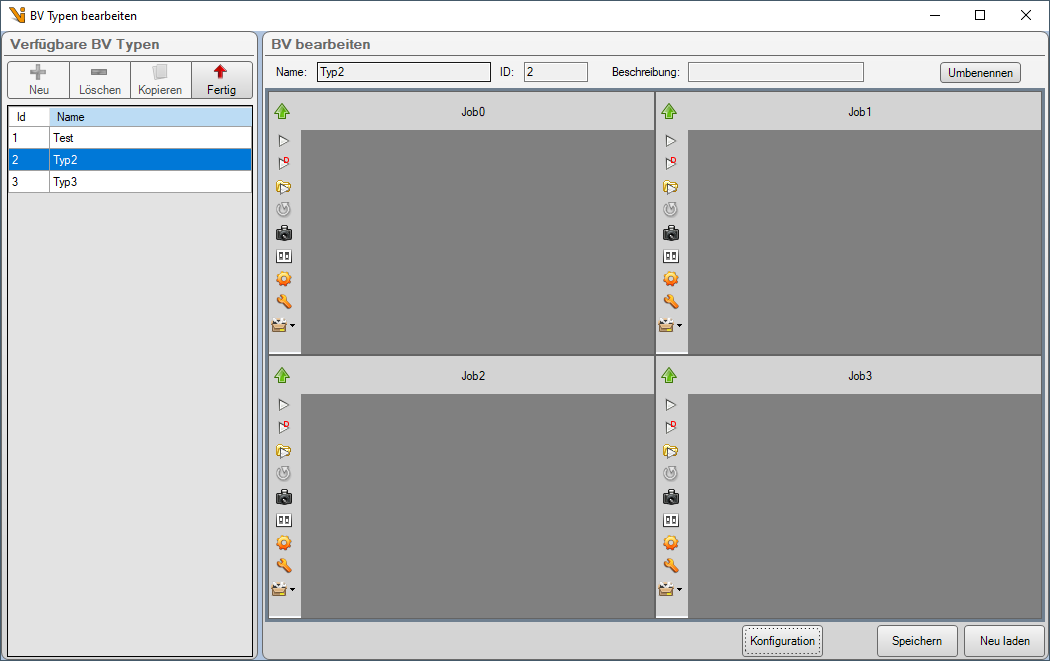
After changing, the settings can either be saved or discarded under (3). With Configuration the display layout or further configuration parameters can be changed subsequently at any time (see below). Before another type can be edited or the window closed, the editing mode must be exited via Done (3).
Note
The type loaded in Viper.NET cannot be changed or deleted here.
For a new type, some basic specifications have to be made first:
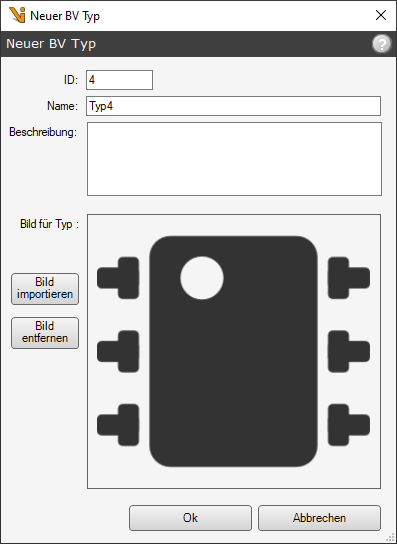
Both ID and Name must be assigned uniquely. The information can be changed later via Rename (2). Description and image are optional, they are displayed in the loading dialog.
The next step is to assign individual displays, jobs and stations to each other. In addition, the arrangement of the displays can be changed (2, 3) and advanced settings can be made (1).
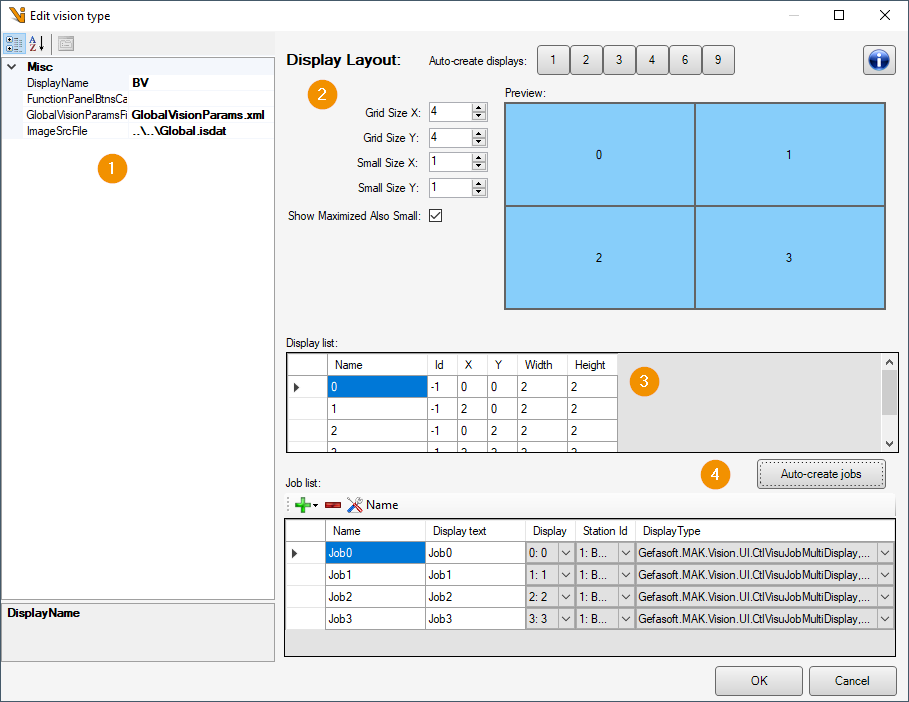
The DisplayLayout is divided into rows and columns like a table. Each display can have multiple rows or columns.
Grid Size X: Defines the number of columns.
Grid Size Y: Defines the number of rows.
Small Size X: Defines the width of a “minimized” display when another display is maximized. With “0” minimized displays are hidden.
Small Size Y: Defines the height of a “minimized” display when another display is maximized. With “0” minimized displays are hidden.
Show Maximized Also Small: Specifies whether a maximized job-displays should also be shown in the list of minimized displays.
The displays are created or edited in the display list (3). By adding a new line, another display can be added. To delete the line, it must be marked by clicking on the line header and then deleted with the “Del” key. The parameters describe the coordinates and the size of the display in the table layout.
Finally, the jobs are created in the job list (4) and assigned to a display and a station. The display type is also specified here, as plug-ins can add further display types.
The following special parameters can be set in the advanced settings (1):
DisplayName: Display name of this configuration. Only relevant with disabled-type-management.
FunctionPanelBtnsCallTgItem:
Warning
The job type can no longer be changed after it has been created. Care should be taken here when using plug-ins with additional job types.
Load types
A type can be charged in several ways.
Through the PLC via the TypeLoadStation.
By the user via load type in Main menu
By the user by clicking on the BV Type field in the header.
Through project-specific plug-in interfaces
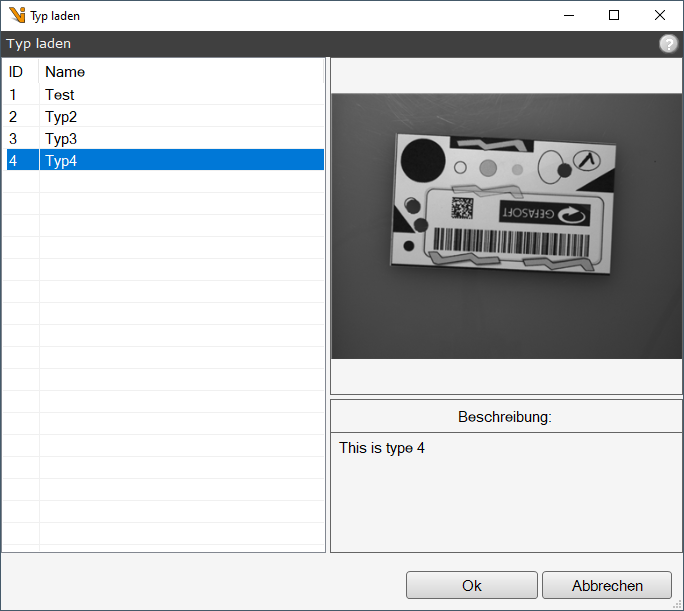
Dialog for type changeover by operator
Depending on the complexity and scope, type reloading can take some time. Alternatively or additionally, it is also possible to switch between differently loaded ToolGroup items with the trigger.
Warning
When loading via external interfaces (PLC, plugin), current changes are not saved!
Archiving types
When saving a type, the user is normally asked whether the type should be archived. As an archive, the type folder is zipped before saving and stored in the VisionTypeArchive folder. To restore the archived type, the current type folder must be replaced with the contents of the zip.
The archive function can be customized via the configuration file globalParams.xml:
<?xml version="1.0" encoding="utf-8"?>
<dataStore guid="81f2f63a-9ffa-4313-ae3f-39dc2a7e8a4a" name="GConfiguration" architecture="MSIL" Version="6.4.0.0">
  ...
  <childStores>
    <dataStore name="VisionPluginConfig" guid="30a23417-f978-4dbd-a2aa-054182260c4a" visionProVersion="9.6" Version="6.4.0.0">
      ...
      <param name="visionTypeArchive" value="VisionTypeArchive" />
      ...
The archive path can be adjusted here. Relative paths refer to the Data folder in the project. With a value="" the archive function is deactivated.