Setting up stations
The following is an example of how to set up Viper.NET stations with the station editor.
As a starting point, a Viper.NET Vision project is created and a image processing type and job is created.
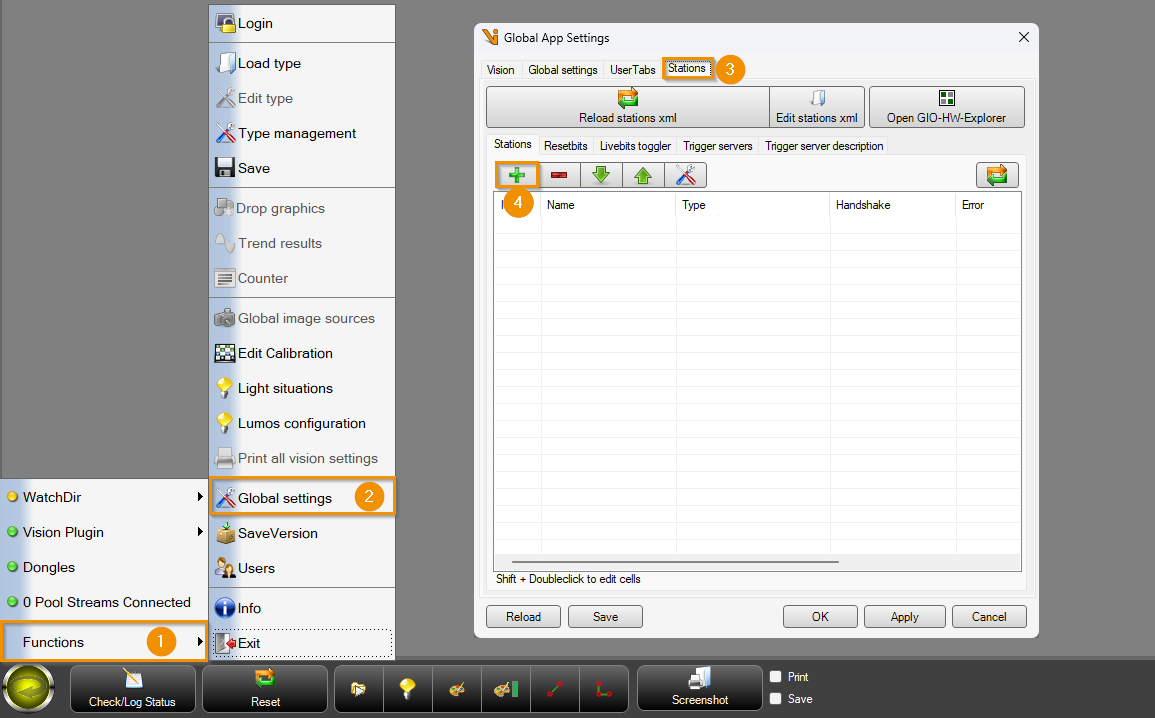
Under MainMenu / Functions (1) / GlobalSettings (2) / Stations (3), a station is now created using the + button (4).
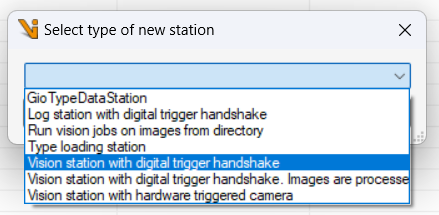
The type of the station to be created can then be selected. The list of station types available for selection can be extended by plugins, which define their own station types. In this example, a digitally triggered vision station (Vision station with digital trigger hanshake) is selected.
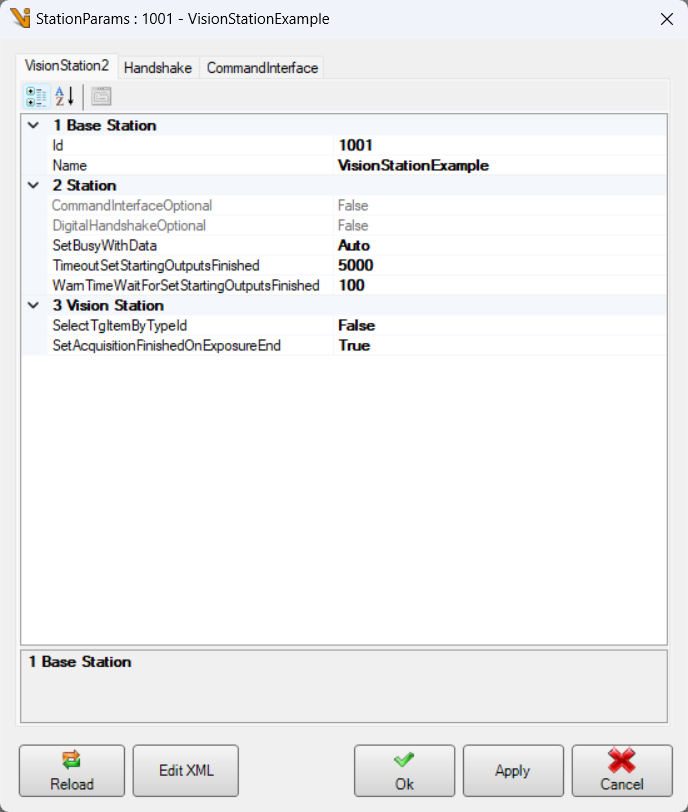
Double-clicking on the created station in the station list opens the station parameter dialog, where basic station parameters can be edited. In addition to the station name and the station ID, which in this example are set to the values “VisionStationExample” and 1001, this includes various other parameters depending on the station type (e.g. for image processing stations).
In the Handshake tab (1), the digital handshake of the station can be configured. A list (2) with all signals supported by the respective station type is displayed in the lower area.
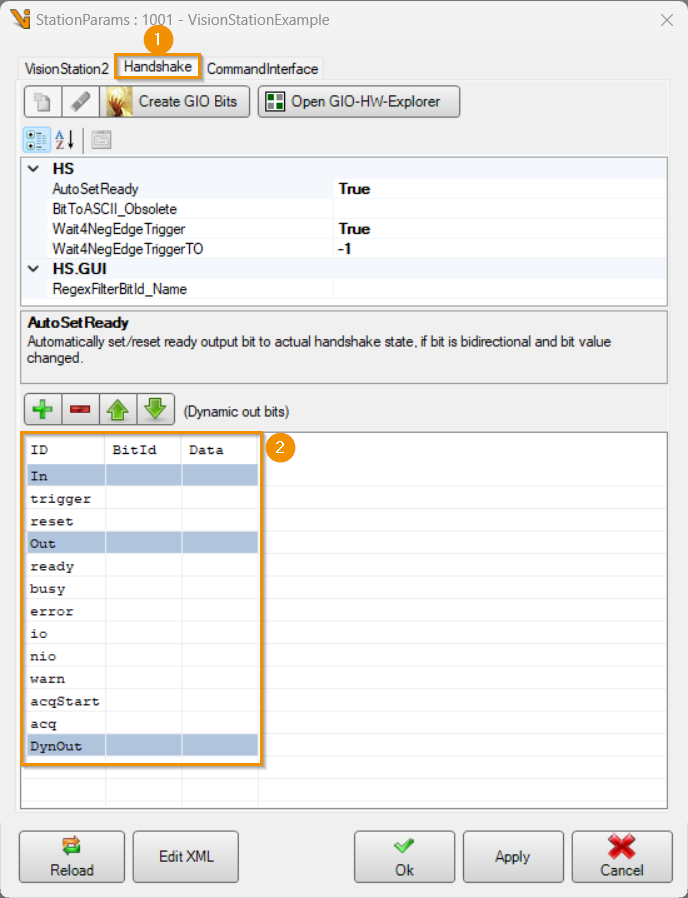
The image processing station used in this example also supports dynamic outputs (1). These can be added, deleted and moved in sequence using the buttons (2).
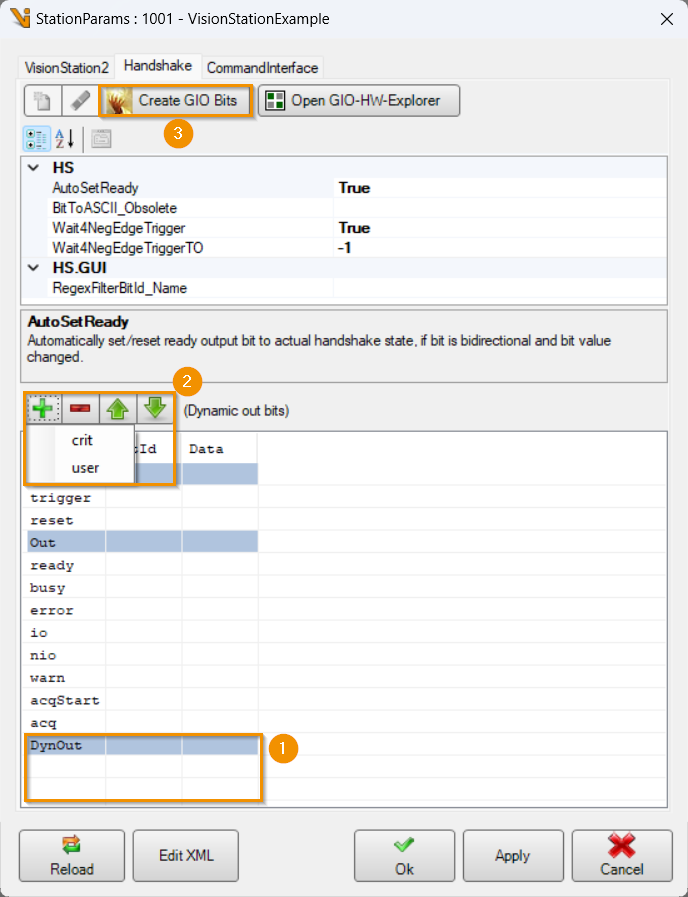
To configure all signals of the handshake, the Create GIO Bits button can be used to open a dialog in which input and output signals and the associated data objects for the digital handshake are interactively created and configured (3 in the previous figure). A configurable scheme for naming the bits and numbering the bit and data IDs based on the station ID (here 1001) is suggested (1). The Create missing bit IDs button (2) can then be used to generate names and IDs according to the defined scheme (3).
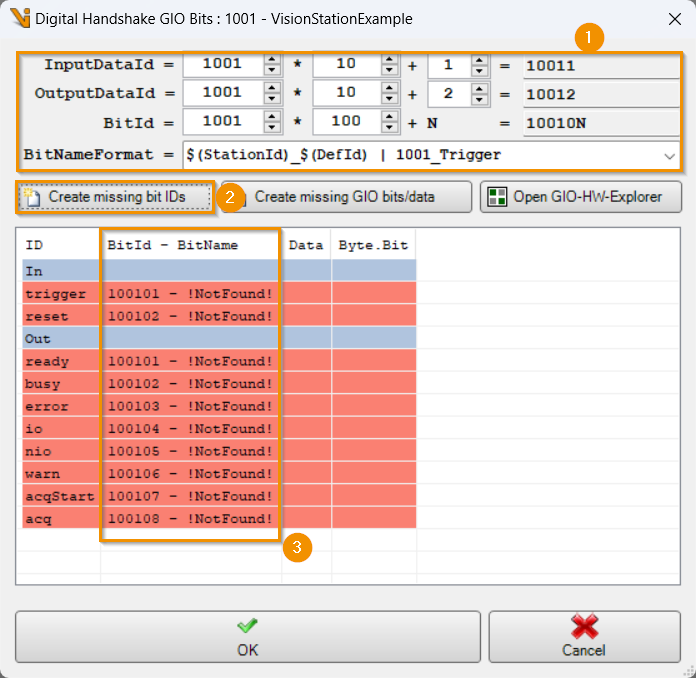
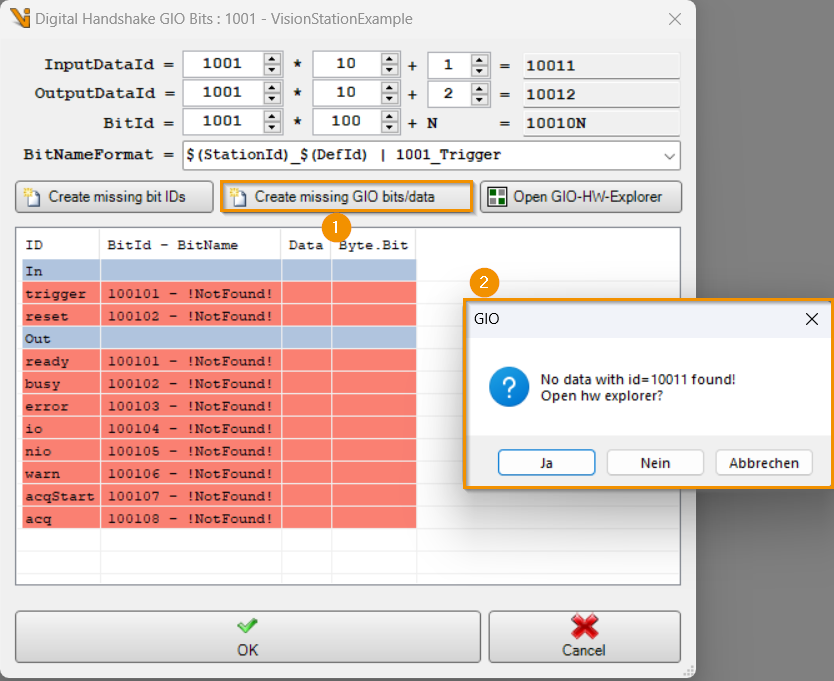
The station signals are then initially displayed with a red background. This indicates that only IDs and names have been generated so far. The associated Data objects in GInOut have not yet been created. These can be created interactively using the Create missing GIO bits/data (1) button. Clicking on the button opens a message (2) that no data object with the ID configured according to the schema exists in which the GIO objects underlying the defined input bits could be created and offers to open the GInOutHardwareExplorer.
- In the hardware explorer that then opens, the title bar (1) shows which objects the user should create there in order to configure the created station for use.
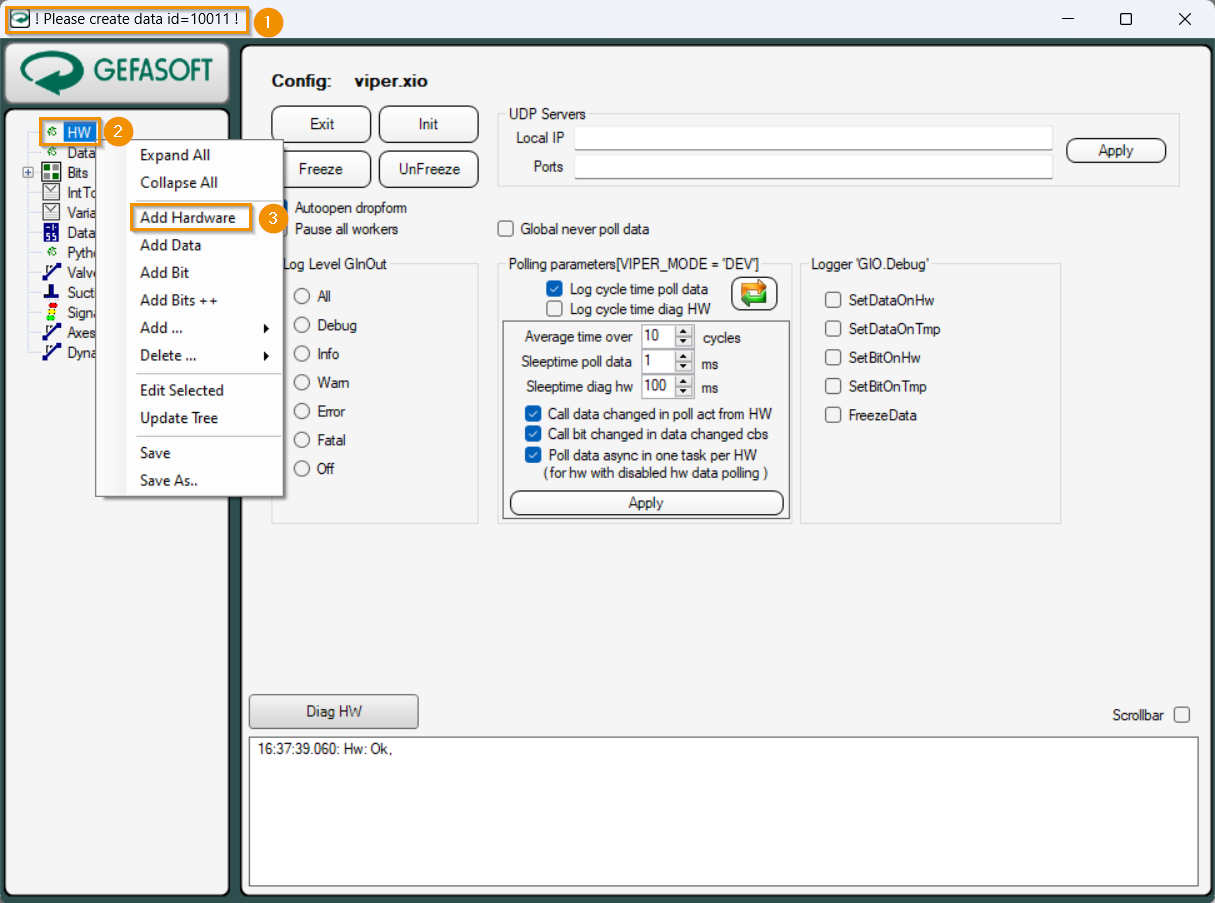
To create the first data object 10011 required for input data, a hardware with a data area to which the data object to be created can be assigned must first be created in the hardware explorer. By right-clicking on the HW node, a new hardware object can be created with Add Hardware (2).